Use at your own risk. The device may become bricked if you do something wrong or as a result of a bug.
After the install, you will NOT be able to use the recovery mode of the ER605 to flash a factory image to recover from a bad install. You will need to use ubiformat to reflash your mtd3 (firmware) partition if you ever want to restore to the default firmware.
- Connect the switch to the power supply and then connect the RJ45 network cable to one of the LAN ports ( 2, 3, 4 or 5). The switch’s DHCP service will automatically assign you the IP address 192.168.0.100 This way you can access the switch using your browser at the IP address 192.168.0.1.

If you do not receive any IP, perhaps the DHCP service has not started and you need to manually assign an IP from the 192.168.0.X range.
It is completely normal to receive the error ‘Your connection is not private’, the certificate assigned to this device is signed by TPlink and your browser does not know this certificate.
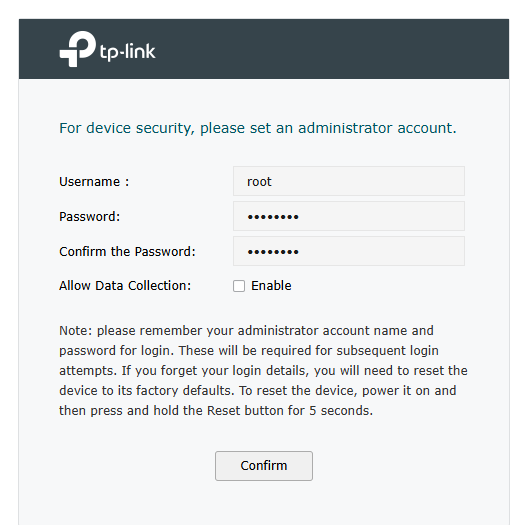
2. In this step you need to assign a password to access the switch, remember that we have a default password and user defined at the beginning of the documentation, it is important to assign the same user and password suggested.
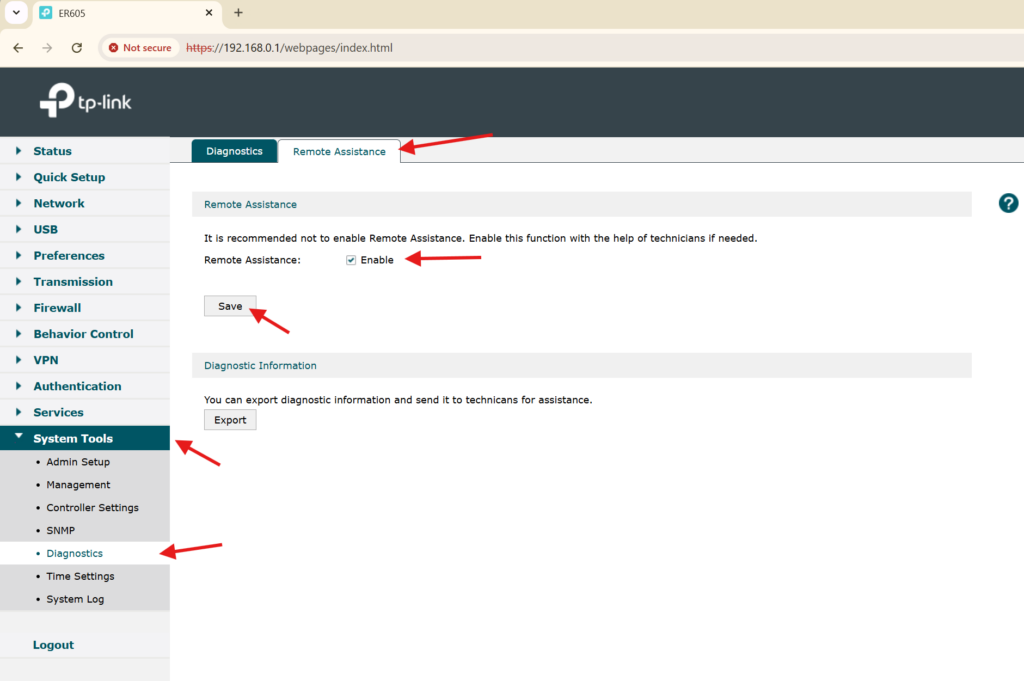
3. Enable SSH on your ER605 by logging into the web configuration GUI, navigating to System Tools > Diagnostics > Remote Assistance, and enabling Remote Assistance.
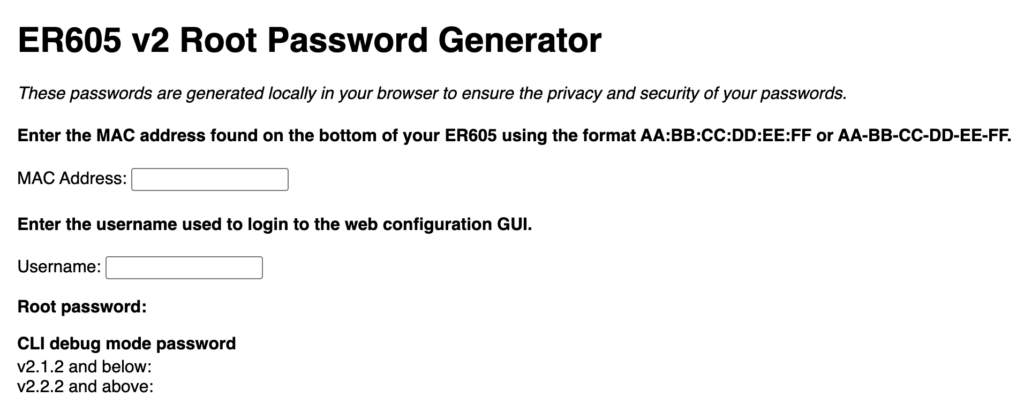
4. Generate your shell password by clicking here, and type the device’s MAC address.
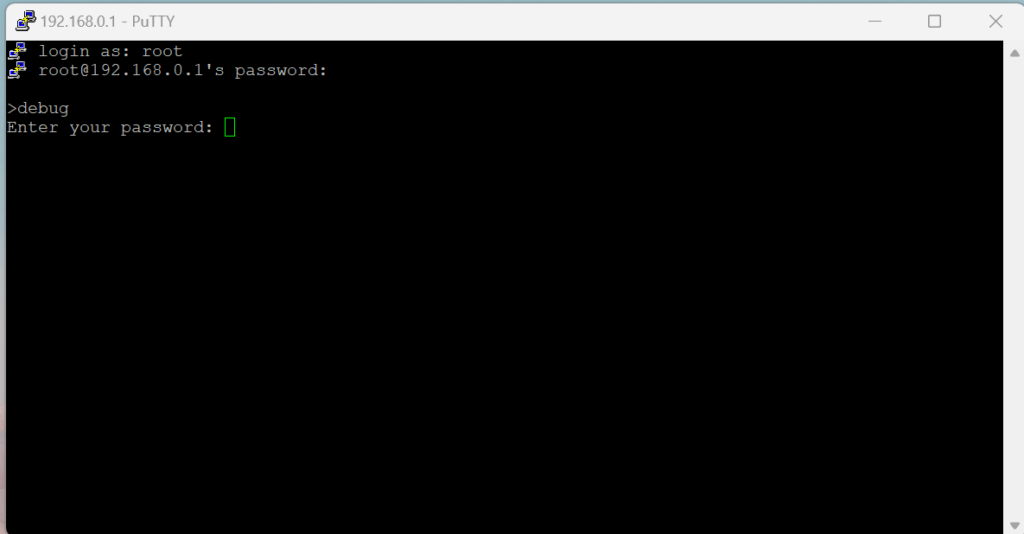
5. Enter on debug mode, type ‘debug’
6. You will be prompted to type the password generate on the step 4:
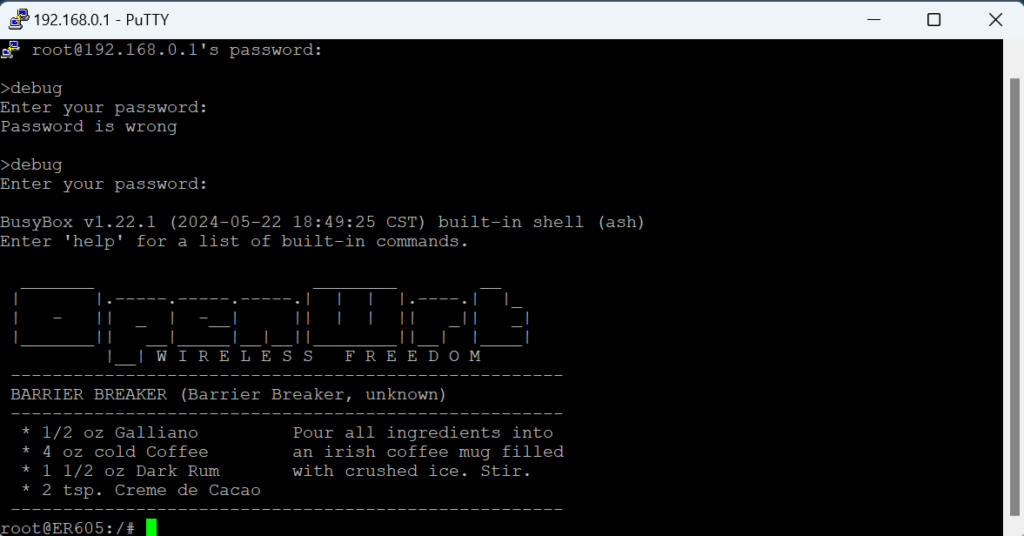
7. You should see something similar on your terminal, after success:
8. Backup your MTD partitions (recommended). The backup process will not be covered in these instructions. You can find some more information on how to do this here: [OpenWrt Wiki] Generic NOR backup
9. After connected using SSH in the device, download openwrt-initramfs-compact.bin and er605v2_write_initramfs.sh to the ER605 (run these commands in the SSH shell):
cd /tmp

curl -o er605v2_write_initramfs.sh https://raw.githubusercontent.com/chill1Penguin/er605v2_openwrt_install/main/er605v2_write_initramfs.sh

curl -o openwrt-initramfs-compact.bin https://raw.githubusercontent.com/chill1Penguin/er605v2_openwrt_install/main/openwrt-initramfs-compact.bin

chmod +x er605v2_write_initramfs.sh
10. Verify the checksum of the openwrt-initramfs-compact.bin image (recommended). It should match the checksum found in the md5sums file.
11. Run er605v2_write_initramfs.sh script to flash the initramfs image.
./er605v2_write_initramfs.sh openwrt-initramfs-compact.bin
12. Reboot the ER605 manually and wait for it to reboot.
13. Open a web browser and navigate to http://192.168.1.1/. If the page does not load, try waiting a bit longer or clearing your browser cache. (Having another router or DHCP server connected to the ER605 could cause page load issues due to an IP address conflict. If you cannot access the web page, disconnect all unnecessary devices from the ER605 and try again.)
14. Follow the steps on the web page.
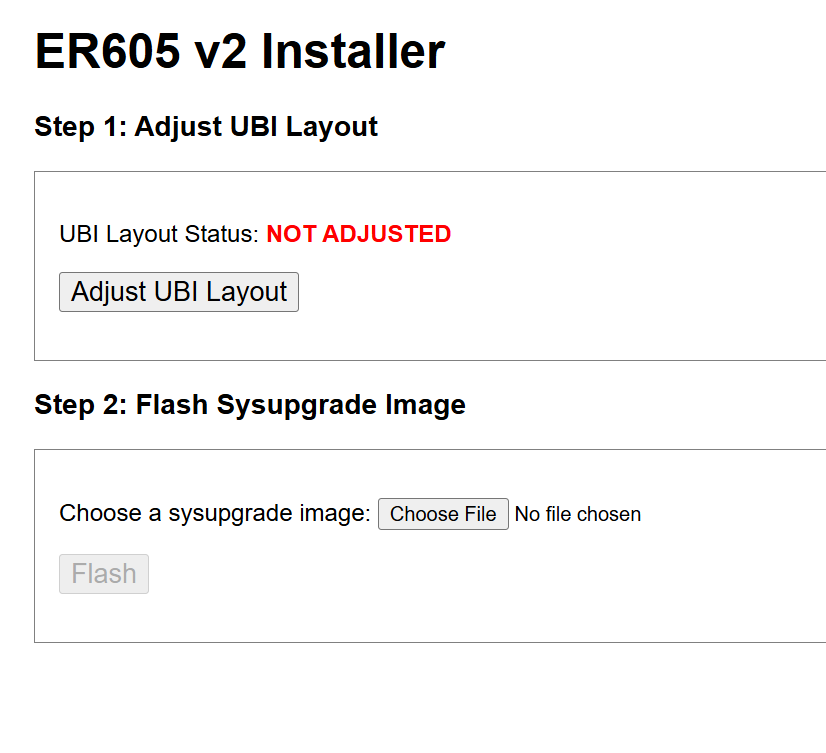
15. After Adjust UBI Layout, you can find a sysupgrade image at https://downloads.openwrt.org. Click here to download the v23.05.0 sysupgrade image and upload at Step 2 straight away.
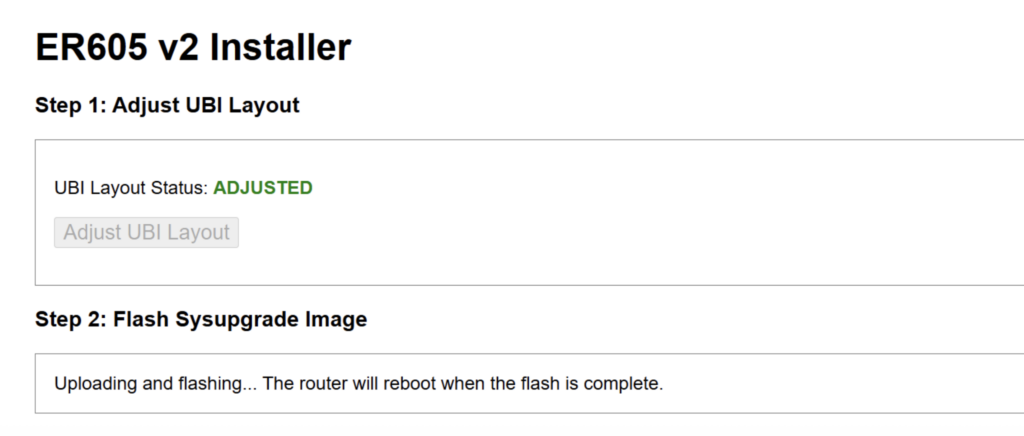
16. After rebooting, your ER605 should boot into LuCI, that’s GUI of your new OpenWrt!
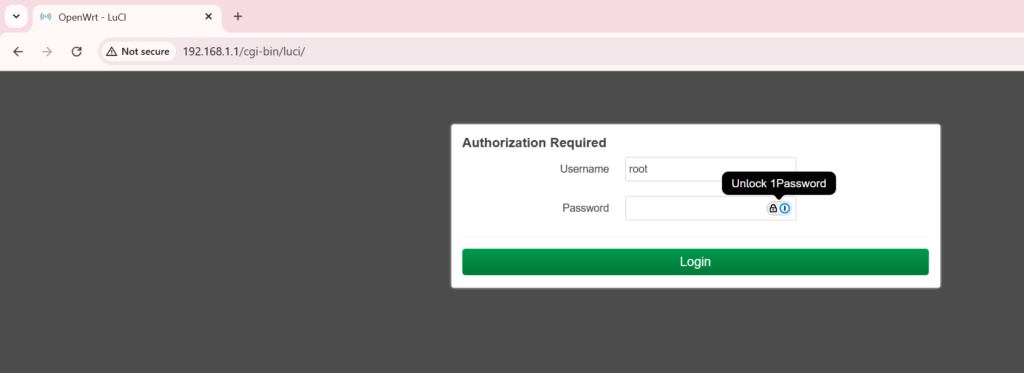
17. Define the root password, and you’re good to go, have fun!

last bits, but not least.
Special thanks to:
- OpenWRT community and forum, these guys know a lot and always share a lot of knowledge!
- Andrew Hirst(chill1Penguin), creator of the basis of many of the things used here. Here is the original documentation from the author.
Leave a Reply